해당 포스팅은 Mastering OpenCV 4 with Python 원서를 바탕으로 작성했습니다. 원서를 옮기는 과정에서 부자연스러운 부분이 있을 수 있습니다. 잘못 작성되거나 어색한 부분에 대해서 알려주시면 감사하겠습니다! 코드 정보는 여기를 클릭하시면 확인하실 수 있습니다.
지난 포스팅에서 OpenCV를 활용해서 다양한 도형을 그리는 방법들과 도형을 그렸을 때, 어떤 장점이 있는 지에 대한 내용을 다뤘습니다. 이번 글에서는 마우스 Event를 활용한 Dynamic Drawing과 그리기 고급편을 함께 소개합니다.
- OpenCV를 활용한 그리기 이론적 소개
- 기본 도형 그리기 - 선, 사각형, 원
- 기본 도형 2 - 클립, 화살표, 타원, 폴리라인
- 텍스트 입력하기
- 마우스 Event를 활용한 Dynamic Drawing
- 그리기 고급편
1. 마우스 이벤트를 활용한 Dynamic Drawing
마우스 이벤트를 다룰 때에는 cv2.setMouseCallback() 함수를 활용합니다.
cv2.setMouseCallback(windowName, onMouse, param=None)windowName은 마우스가 동작할 도화지같은 역할이라고 볼 수 있습니다. 만약, 이미지 위에 액션을 진행하고 싶다면 image를 windowName에 넣어주면 됩니다. onMouse는 더블클릭과 같은 Mouse의 행동에 따른 액션을 저장하는 콜백 함수입니다. param은 추가적으로 줘야할 정보가 있을 때, 포함할 수 있으며 항상 존재하지 않아도 됩니다. 이 중에서 onMouse에 대한 callback 함수를 예시로 만들어보면 아래처럼 작성할 수 있습니다.
def draw_circle(event, x, y, flags, param):
    if event == cv2.EVENT_LBUTTONDBLCLK:
        print("event: EVENT_LBUTTONDBLCLK")
        cv2.circle(image, (x, y), 10, colors['magenta'], -1)

    if event == cv2.EVENT_MOUSEMOVE:
        print("event: EVENT_MOUSEMOVE")

    if event == cv2.EVENT_LBUTTONUP:
        print("event: EVENT_LBUTTONUP")

    if event == cv2.EVENT_LBUTTONDOWN:
print("event: EVENT_LBUTTONDOWN")draw_circle이라는 함수는 마우스의 왼쪽 스위치를 더블클릭했을 때, 마우스가 있는 위치에 원을 그리는 함수입니다. 다른 액션에 대해서는 어떤 이벤트가 발생했는 지에 대한 정보만 출력하도록 구성했습니다. 콜백 함수를 만들었다면, 이제 windowName에 넣어줄 것을 만들어야 합니다. window는 아래와 같이 만들 수 있습니다.
# Window 생성
cv2.namedWindow('Image mouse')Window와 함수를 모두 작성했다면 아래와 같이 만들 수 있습니다.
#Image mouse window에서 더블클릭하면 원을 그림
cv2.setMouseCallback('Image mouse', draw_circle)직접 구동해본 결과 더블클릭 인식이 생각보다 잘 안되서 왼쪽 버튼이 클릭되면 동작하도록 소스코드를 살짝 수정했습니다.
"""
Example to show how to draw circles using the mouse events in OpenCV
"""

# Import required packages:
import cv2
import numpy as np

# Dictionary containing some colors:
colors = {'blue': (255, 0, 0), 'green': (0, 255, 0), 'red': (0, 0, 255), 'yellow': (0, 255, 255),
          'magenta': (255, 0, 255), 'cyan': (255, 255, 0), 'white': (255, 255, 255), 'black': (0, 0, 0),
          'gray': (125, 125, 125), 'rand': np.random.randint(0, high=256, size=(3,)).tolist(),
          'dark_gray': (50, 50, 50), 'light_gray': (220, 220, 220)}


# This is the mouse callback function:
def draw_circle(event, x, y, flags, param):
    if event == cv2.EVENT_LBUTTONDBLCLK:
        print("event: EVENT_LBUTTONDBLCLK")

    if event == cv2.EVENT_MOUSEMOVE:
        print("event: EVENT_MOUSEMOVE")

    if event == cv2.EVENT_LBUTTONUP:
        print("event: EVENT_LBUTTONUP")

    if event == cv2.EVENT_LBUTTONDOWN:
        print("event: EVENT_LBUTTONDOWN")
        cv2.circle(image, (x, y), 10, colors['magenta'], -1)

# We create the canvas to draw: 600 x 600 pixels, 3 channels, uint8 (8-bit unsigned integers)
# We set the background to black using np.zeros():
image = np.zeros((600, 600, 3), dtype="uint8")

# We create a named window where the mouse callback will be established:
cv2.namedWindow('Image mouse')

# We set the mouse callback function to 'draw_circle':
cv2.setMouseCallback('Image mouse', draw_circle)

while True:
    # Show image 'Image mouse':
    cv2.imshow('Image mouse', image)

    # Continue until 'q' is pressed:
    if cv2.waitKey(20) & 0xFF == ord('q'):
        break

# Destroy all generated windows: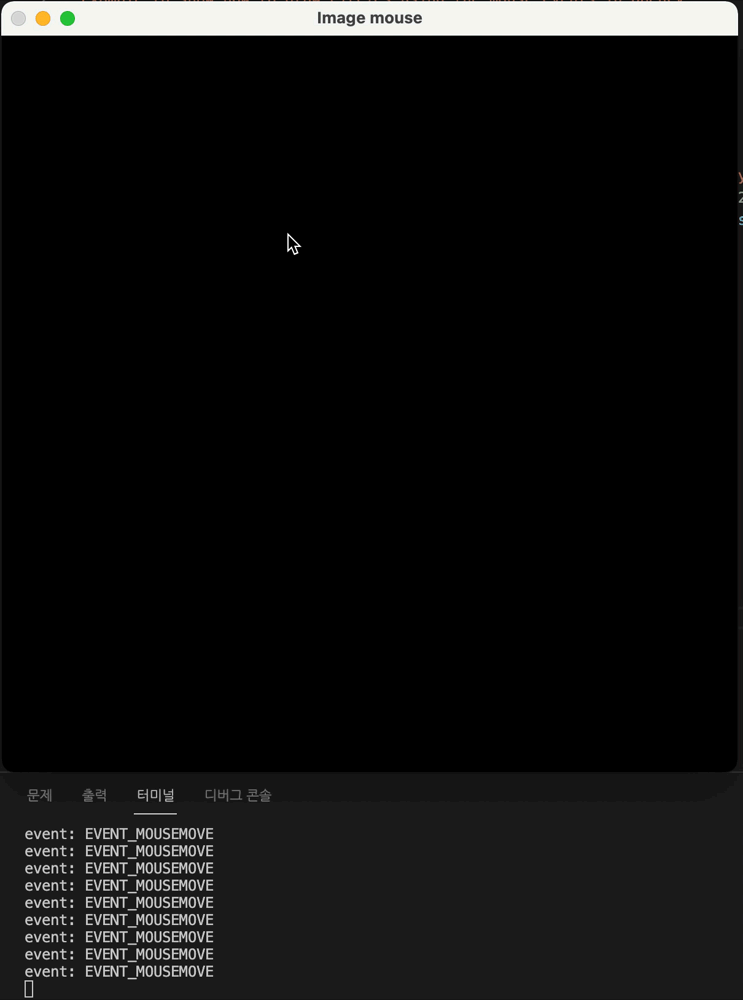
cv2.destroyAllWindows()위의 코드를 실행하면 아래와 같은 까만화면에 좌클릭을 할 때마다 해당 지점에 원이 그려지게 됩니다. 만약에 다른 것들을 추가하고 싶다면, draw_circle을 수정하면 됩니다.
그렇다면 이번에는 텍스트와 도형을 동시에 나타날 수 있도록 해봅시다. 위의 것과 다르게 마우스의 행동에 따라 다양하게 동작하도록 수정된 코드입니다. text를 입력하기 위해서는 이전 글에서 소개한 putText를 활용하면 됩니다. 저는 맥에서 동작시키는 데 더블클릭을 인식하기보다는 DOWN, UP이 반복되는 형태라서 일부 수정했습니다. 혹시 직접 실습해보신 분들은 괜찮은 지 궁금합니다! 댓글로 남겨주시면 감사하겠습니다!
"""
Example to show how to draw basic shapes and mouse events with OpenCV
"""

# Import required packages:
import cv2
import numpy as np

# Dictionary containing some colors:
colors = {'blue': (255, 0, 0), 'green': (0, 255, 0), 'red': (0, 0, 255), 'yellow': (0, 255, 255),
          'magenta': (255, 0, 255), 'cyan': (255, 255, 0), 'white': (255, 255, 255), 'black': (0, 0, 0),
          'gray': (125, 125, 125), 'rand': np.random.randint(0, high=256, size=(3,)).tolist(),
          'dark_gray': (50, 50, 50), 'light_gray': (220, 220, 220)}


# This is the mouse callback function:
def draw_text():
    # We set the position to be used for drawing text:
    menu_pos = (10, 500)
    menu_pos2 = (10, 525)
    menu_pos3 = (10, 550)
    menu_pos4 = (10, 575)

    # Write the menu:
    cv2.putText(image, 'Double left click: add a circle', menu_pos, cv2.FONT_HERSHEY_SIMPLEX, 0.7, (255, 255, 255))
    cv2.putText(image, 'Simple right click: delete last circle', menu_pos2, cv2.FONT_HERSHEY_SIMPLEX, 0.7,
                (255, 255, 255))
    cv2.putText(image, 'Double right click: delete all circle', menu_pos3, cv2.FONT_HERSHEY_SIMPLEX, 0.7,
                (255, 255, 255))
    cv2.putText(image, 'Press \'q\' to exit', menu_pos4, cv2.FONT_HERSHEY_SIMPLEX, 0.7, (255, 255, 255))


# mouse callback function
def draw_circle(event, x, y, flags, param):
    """Mouse callback function"""

    global circles
    if event == cv2.EVENT_LBUTTONDBLCLK:
        # Add the circle with coordinates x,y
        print("event: EVENT_LBUTTONDBLCLK")
        circles.append((x, y))
    if event == cv2.EVENT_RBUTTONDBLCLK:
        # Delete all circles (clean the screen)
        print("event: EVENT_RBUTTONDBLCLK")
        circles[:] = []
    elif event == cv2.EVENT_RBUTTONDOWN:
        # Delete last added circle
        print("event: EVENT_RBUTTONDOWN")
        try:
            circles.pop()
        except (IndexError):
            print("no circles to delete")
    if event == cv2.EVENT_MOUSEMOVE:
        print("event: EVENT_MOUSEMOVE")
    if event == cv2.EVENT_LBUTTONUP:
        print("event: EVENT_LBUTTONUP")
    if event == cv2.EVENT_LBUTTONDOWN:
        print("event: EVENT_LBUTTONDOWN")


# Structure to hold the created circles:
circles = []

# We create the canvas to draw: 600 x 600 pixels, 3 channels, uint8 (8-bit unsigned integers)
# We set the background to black using np.zeros():
image = np.zeros((600, 600, 3), dtype="uint8")

# We create a named window where the mouse callback will be established:
cv2.namedWindow('Image mouse')

# We set the mouse callback function to 'draw_circle':
cv2.setMouseCallback('Image mouse', draw_circle)

# We draw the menu:
draw_text()

# We get a copy with only the text printed in it:
clone = image.copy()

while True:

    # We 'reset' the image (to get only the image with the printed text):
    image = clone.copy()

    # We draw now only the current circles:
    for pos in circles:
        # We print the circle (filled) with a  fixed radius (30):
        cv2.circle(image, pos, 30, colors['blue'], -1)

    # Show image 'Image mouse':
    cv2.imshow('Image mouse', image)

    # Continue until 'q' is pressed:
    if cv2.waitKey(400) & 0xFF == ord('q'):
        break

# Destroy all generated windows:
cv2.destroyAllWindows()코드를 실행하면 아래와 같이 작동합니다. 오른쪽 더블클릭하면 모든 원이 사라져야 하는데, 원이 두개씩 사라지는 것을 보실 수 있습니다. 맥에서는 더블클릭을 잘 인식하지 못하는 것 같습니다.

마지막으로 matplotlib에서도 mouse event를 적용할 수 있습니다. update_img_with_matplotlib은 현재 그려진 이미지를 지속적으로 업데이트하고 보여주는 함수입니다.
def update_img_with_matplotlib():
    """Updates an image using matplotlib capabilities"""

    # Convert BGR to RGB image format:
    img_RGB = image[:, :, ::-1]

    # Display the image:
    plt.imshow(img_RGB)

    # Redraw the Figure because the image has been updated:
figure.canvas.draw()또한 이전에 그렸던 함수와 다르게 click_mouse_event라는 콜백함수는 원을 그리고 나서 update하는 함수를 포함하고 있습니다.
def click_mouse_event(event):
    # (event.xdata, event.ydata) contain the float coordinates of the mouse click event:
    cv2.circle(image, (int(round(event.xdata)), int(round(event.ydata))), 30, colors['blue'], cv2.FILLED)
    # Call 'update_image()' method to update the Figure:
update_img_with_matplotlib()전체 코드는 아래의 접은글에서 확인하실 수 있습니다.
"""
Example to show how to capture mouse events with matplotlib to draw a circle
"""

# Import required packages:
import cv2
import numpy as np
import matplotlib.pyplot as plt

colors = {'blue': (255, 0, 0), 'green': (0, 255, 0), 'red': (0, 0, 255), 'yellow': (0, 255, 255),
          'magenta': (255, 0, 255), 'cyan': (255, 255, 0), 'white': (255, 255, 255), 'black': (0, 0, 0),
          'gray': (125, 125, 125), 'rand': np.random.randint(0, high=256, size=(3,)).tolist(),
          'dark_gray': (50, 50, 50), 'light_gray': (220, 220, 220)}

# We create the canvas to draw: 400 x 400 pixels, 3 channels, uint8 (8-bit unsigned integers)
# We set the background to black using np.zeros():
image = np.zeros((400, 400, 3), dtype="uint8")

# If you want another background color you can do the following:
image[:] = colors['light_gray']


def update_img_with_matplotlib():
    """Updates an image using matplotlib capabilities"""

    # Convert BGR to RGB image format:
    img_RGB = image[:, :, ::-1]

    # Display the image:
    plt.imshow(img_RGB)

    # Redraw the Figure because the image has been updated:
    figure.canvas.draw()


# We define the event listener for the 'button_press_event':
def click_mouse_event(event):
    # (event.xdata, event.ydata) contain the float coordinates of the mouse click event:
    cv2.circle(image, (int(round(event.xdata)), int(round(event.ydata))), 30, colors['blue'], cv2.FILLED)
    # Call 'update_image()' method to update the Figure:
    update_img_with_matplotlib()


# We create the Figure:
figure = plt.figure()
figure.add_subplot(111)

# To show the image until a click is performed:
update_img_with_matplotlib()

# 'button_press_event' is a MouseEvent where a mouse botton is click (pressed)
# When this event happens the function 'click_mouse_event' is called:
figure.canvas.mpl_connect('button_press_event', click_mouse_event)

# Display the figure:
plt.show()위에서 실행한 코드는 아래처럼 동작합니다. Matplotlib 캔버스 위에 원을 그릴 수 있습니다! Matplotlib에서는 button_press_event, button_release_event, motion_notify_event, scroll_event 와 같은 이벤트를 설정할 수 있습니다. 혹시 자세한 내용이 궁금하시다면 여기를 참고하세요.

2. 그리기 고급편
이번에는 이번 챕터에서 배웠던 것들을 활용해서 현재의 시간을 알려주는 아날로그 형식의 시계를 만들어 보겠습니다. analog_clock_opencv.py와 analog_clock_values.py를 활용합니다. 여기서 analog_clock_opencv에는 선, 원, 사각형, 글씨를 사용해서 시계를 만들 것입니다. hours_orig와 hours_dest라는 array가 필요한데, 해당 지점들은 시간을 표현하기 위한 마킹이라고 보시면 됩니다. hours에 대한 array를 구하기 위해 analog_clock_values.py를 활용합니다.
import math

radius = 300
center = (320, 320)

for x in (0, 30, 60, 90, 120, 150, 180, 210, 240, 270, 300, 330):
    x_coordinate = center[0] + radius * math.cos(x * 3.14 / 180)
    y_coordinate = center[1] + radius * math.sin(x * 3.14 / 180)
    print("x: {} y: {}".format(round(x_coordinate), round(y_coordinate)))

print("..............")

for x in (0, 30, 60, 90, 120, 150, 180, 210, 240, 270, 300, 330):
    x_coordinate = center[0] + (radius - 20) * math.cos(x * 3.14 / 180)
    y_coordinate = center[1] + (radius - 20) * math.sin(x * 3.14 / 180)
print("x: {} y: {}".format(round(x_coordinate), round(y_coordinate)))그리고 시계를 그리기 위해서는 각 지점에 대한 각도가 필요하고 해당 각도를 x, y좌표로 변경하기 위해서는 삼각함수를 활용하면 됩니다. $x = rcos \theta$, $y = rsin \theta$ 라는 공식을 활용할 수 있습니다. 그래서 현재의 시간을 datetime 라이브러리를 활용하여 받은 뒤 해당 시간을 hour, minute, second로 분할하고 각 값에 대한 각도를 구해줍니다. 각도를 활용해서 (x, y) 형태로 변환한 뒤 시간이 지나가는 것과 같이 계속 출력해줍니다.
전체 코드는 아래의 접은 글에 포함하였으니 직접 진행하고 싶으시면 해보시면 되겠습니다.
"""
Example to show how to draw an analog clock OpenCV
"""

# Import required packages:
import cv2
import numpy as np
import datetime
import math


def array_to_tuple(arr):
    return tuple(arr.reshape(1, -1)[0])


# Dictionary containing some colors
colors = {'blue': (255, 0, 0), 'green': (0, 255, 0), 'red': (0, 0, 255), 'yellow': (0, 255, 255),
          'magenta': (255, 0, 255), 'cyan': (255, 255, 0), 'white': (255, 255, 255), 'black': (0, 0, 0),
          'gray': (125, 125, 125), 'rand': np.random.randint(0, high=256, size=(3,)).tolist(),
          'dark_gray': (50, 50, 50), 'light_gray': (220, 220, 220)}

# We create the canvas to draw: 640 x 640 pixels, 3 channels, uint8 (8-bit unsigned integers)
# We set background to black using np.zeros()
image = np.zeros((640, 640, 3), dtype="uint8")

# If you want another background color you can do the following:
image[:] = colors['light_gray']

# Coordinates to define the origin for the hour markings:
hours_orig = np.array(
    [(620, 320), (580, 470), (470, 580), (320, 620), (170, 580), (60, 470), (20, 320), (60, 170), (169, 61), (319, 20),
     (469, 60), (579, 169)])

# Coordinates to define the destiny for the hour markings:
hours_dest = np.array(
    [(600, 320), (563, 460), (460, 562), (320, 600), (180, 563), (78, 460), (40, 320), (77, 180), (179, 78), (319, 40),
     (459, 77), (562, 179)])

# We draw the hour markings:
for i in range(0, 12):
    cv2.line(image, array_to_tuple(hours_orig[i]), array_to_tuple(hours_dest[i]), colors['black'], 3)

# We draw a big circle, corresponding to the shape of the analog clock
cv2.circle(image, (320, 320), 310, colors['dark_gray'], 8)

# We draw the rectangle containig the text and the text "Mastering OpenCV 4 with Python":
cv2.rectangle(image, (150, 175), (490, 270), colors['dark_gray'], -1)
cv2.putText(image, "Mastering OpenCV 4", (150, 200), 1, 2, colors['light_gray'], 1, cv2.LINE_AA)
cv2.putText(image, "with Python", (210, 250), 1, 2, colors['light_gray'], 1, cv2.LINE_AA)

# We make a copy of the image with the "static" information
image_original = image.copy()

# Now, we draw the "dynamic" information:
while True:
    # Get current date:
    date_time_now = datetime.datetime.now()
    # Get current time from the date:
    time_now = date_time_now.time()
    # Get current hour-minute-second from the time:
    hour = math.fmod(time_now.hour, 12)
    minute = time_now.minute
    second = time_now.second

    print("hour:'{}' minute:'{}' second: '{}'".format(hour, minute, second))

    # Get the hour, minute and second angles:
    second_angle = math.fmod(second * 6 + 270, 360)
    minute_angle = math.fmod(minute * 6 + 270, 360)
    hour_angle = math.fmod((hour * 30) + (minute / 2) + 270, 360)

    print("hour_angle:'{}' minute_angle:'{}' second_angle: '{}'".format(hour_angle, minute_angle, second_angle))

    # Draw the lines corresponding to the hour, minute and second needles
    second_x = round(320 + 310 * math.cos(second_angle * 3.14 / 180))
    second_y = round(320 + 310 * math.sin(second_angle * 3.14 / 180))
    cv2.line(image, (320, 320), (second_x, second_y), colors['blue'], 2)

    minute_x = round(320 + 260 * math.cos(minute_angle * 3.14 / 180))
    minute_y = round(320 + 260 * math.sin(minute_angle * 3.14 / 180))
    cv2.line(image, (320, 320), (minute_x, minute_y), colors['blue'], 8)

    hour_x = round(320 + 220 * math.cos(hour_angle * 3.14 / 180))
    hour_y = round(320 + 220 * math.sin(hour_angle * 3.14 / 180))
    cv2.line(image, (320, 320), (hour_x, hour_y), colors['blue'], 10)

    # Finally, a small circle, corresponding to the point where the three needles joint, is drawn:
    cv2.circle(image, (320, 320), 10, colors['dark_gray'], -1)

    # Show image:
    cv2.imshow("clock", image)

    # We get the image with the static information:
    image = image_original.copy()

    # A wait of 500 milliseconds is performed (to see the displayed image)
    # Press q on keyboard to exit the program:
    if cv2.waitKey(500) & 0xFF == ord('q'):
        break

# Release everything:
cv2.destroyAllWindows()위의 코드의 일부분만 수정하여서 실행한 결과는 다음과 같습니다.

이렇게 해서 chapter 4에서 다뤄야할 내용들을 다뤘습니다. 직접 실행해보면서 마우스의 이벤트로 추가할 수 있는 기능들도 있어서 신기했습니다. 다음에는 chapter 5의 내용으로 다시 찾아오겠습니다!